Wellness Wednesday: Andrea Nguyen’s Roasted Cauliflower “Wings”
- by bonappetit
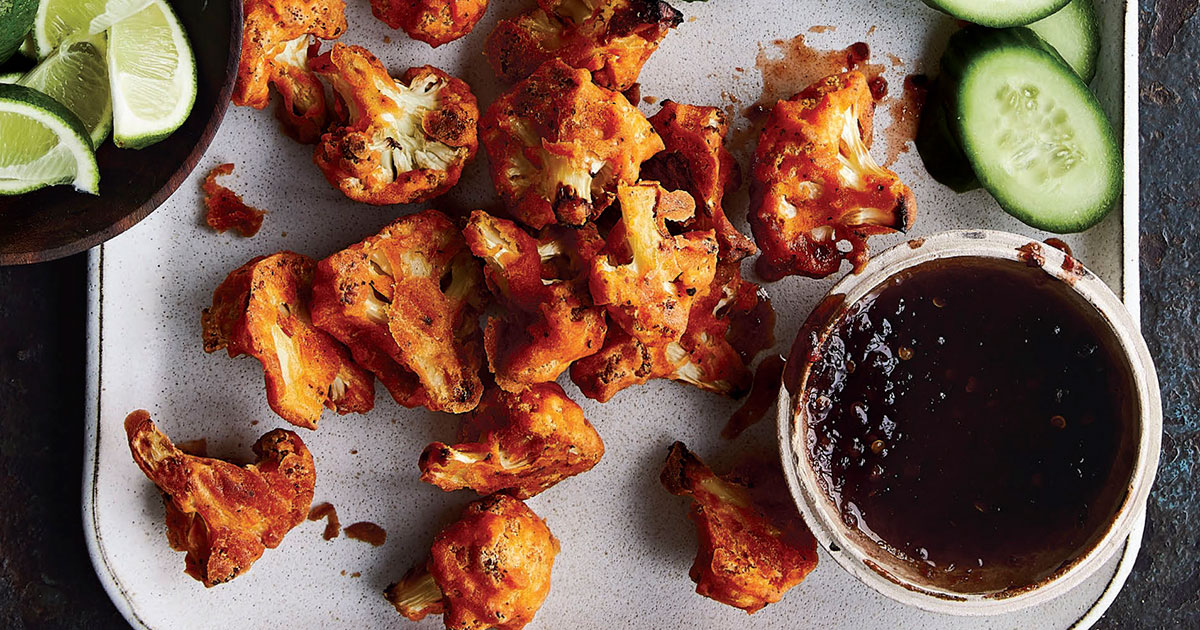
Cauliflower “wings”
We’re inviting some of our trusted nonprofit and Star Chef partners to take over the Bon Appétit blog and share their best tips, recipes, and fun links. This week’s guest curator is Andrea Nguyen, author of the best-selling Vietnamese Food Any Day and others — and a repeat Star Chef partner of Bon Appétit’s, who has shared her recipes and signed cookbooks for hundreds of our guests.
This plant-based version of wings has all of the umami and crunch of the regular fried chicken version, but it’s a lot easier to eat — and easier on your health and the planet’s. Just coat snack-size cauliflower florets in batter and bake them until crisp on the outside and tender on the inside. Serving the sauce on the side preserves the just-baked texture well. The batter is a bit tricky, so weigh the flour for an exact measurement.
Roasted Cauliflower “Wings”
Takes 1 hour. Serves 4 to 6
1 to 1.25 pounds cauliflower florets
5.6 ounces white or brown rice flour (such as Bob’s Red Mill)
1 teaspoon fine sea salt
1/4 to 1/2 teaspoon recently ground black pepper (use the maximum for a lick of heat)
1 1/4 teaspoons paprika
Brimming 2/3 cup water
2 1/2 tablespoons canola or other neutral oil
1 tablespoon sugar
1 tablespoon Bragg Liquid Aminos, Maggi Seasoning sauce, or soy sauce
3 tablespoons chile garlic sauce (see recipe below)
1/4 cup light corn syrup or brown rice syrup
Preheat the oven to 425°F. Line a rimmed baking sheet with parchment paper and coat with neutral oil or cooking spray.
Pat the cauliflower florets dry with paper towels and, if needed, cut into pieces no larger than 2 inches at their widest point. Set aside.
In a large bowl, combine the rice flour, salt, pepper, and paprika. Whisk in the water to hydrate, then add the canola oil; aim for a thick consistency (imagine very soft frosting) that will stick on the cauliflower and bake into a shell-like coating. (If the batter is too thick, whisk in more water, 1 teaspoon at a time; brown rice flour will need an additional 2 to 3 teaspoons.) An overly pasty batter bakes up extra crunchy, but that’s not a bad thing.
Add the cauliflower to the batter, using a spatula to coat nearly all exposed surfaces of the florets (a few bare spots are great for ventilation and help to create a crisp finish). Stir and fold the ingredients, turning and shaking the bowl, if it helps. Spread out the florets on the prepared pan, cut-side down, with none touching.
Roast the cauliflower for 30 minutes, until the tops feel dry-ish and hard and the bottoms have browned here and there. Turn the florets and roast 12 to 15 minutes longer to crisp the other side.
Meanwhile, in a small saucepan, stir together the sugar, Bragg Liquid Aminos, chile garlic sauce, and corn syrup. Bring to a brisk simmer over medium heat. Remove from the heat and, after the bubbling action subsides, pour into a small, heatproof bowl. Let cool and thicken for 20 minutes while the cauliflower roasts.
When the cauliflower is done, let cool for 5 to 10 minutes. Serve with the sauce for dipping. Baked florets will remain crisp for 2 hours and can be reheated in a 350°F oven for 5 to 6 minutes, until warm.
Chile Garlic Sauce
Takes 10 minutes, plus 30 minutes to rest. Makes about two-thirds cup.
 In the late summer and early fall, when chiles are at their plump, red-hot best, I load up to make this condiment. It’s my version of tương ớt tỏi Việt-Nam, the chile garlic sauce that Huy Fong (the “rooster brand”) developed for the Viet palate. The commercial product is sold at supermarkets in plastic jars next to its Indonesian kin, sambal oelek. But when made at home, chile garlic sauce is brighter tasting, and you can play with the heat, sweetness, and tang. It’s super-simple and fast to make, with a payoff that lasts for months.
6 ounces hot or medium-hot red chiles, such as Fresno, jalapeño, or serrano, coarsely chopped, with seeds intact
4 garlic cloves, coarsely chopped
Fine sea salt
1 tablespoon sugar, plus more as needed
1 1/2 tablespoons distilled white vinegar (preferably Heinz), plus more as needed
In a food processor, combine the chiles, garlic, 1/2 teaspoon salt, sugar, and vinegar, and whirl to a coarse texture. Take a whiff; it should make you sweat a bit.
Transfer the chile mixture to a small saucepan. Bring to a gentle simmer over medium heat, then lower the heat and continue simmering softly for about 3 minutes, or until the sauce no longer smells raw.
Remove the pan from the heat and set aside to cool for 5 minutes. Season with salt, a pinch at a time, to add savory depth, and sweeten with more sugar, half-teaspoon at a time, to curb the heat. Add more vinegar, half to one teaspoon at a time, to brighten. Aim for a spicy, slightly sweet, tangy finish. Let it rest, uncovered, for about 30 minutes to cool, mellow, and mature before using. The sauce may be stored in an airtight container, refrigerated, for up to 6 months.
HOW TO CHOP CHILES WITHOUT GLOVES
When working with hot chiles, I don’t wear gloves to protect my hands from their fiery oils. Instead, I minimize contact by using the stem of the chile as my helper.
To chop a chile, quarter it lengthwise but keep the stem intact. Hold on to the stem while cutting the chile crosswise; chop further if needed. Then use the stem to scoot the chile pieces onto the side of your knife blade and use the stem again to push off the chile pieces into a bowl or wherever they are needed. If you mistakenly touch the seeds or inner membranes, promptly wash your hands with coarse salt and soap.
Reprinted with permission from Vietnamese Food Any Day: Simple Recipes for True, Fresh Flavors by Andrea Nguyen, copyright © 2019. Published by Ten Speed Press, an imprint of Penguin Random House. Photography credit: Aubrie Pick © 2019